
Recently I was contacted about making another Dreambird, this time in the colors of the sea. I realized as I was looking back in my blog that I have only ever posted the first Dreambird that I’d ever made. After making that one I was contacted by a few people asking if I could make them one and over the last year I feel like I’ve made a hundred. Ok, maybe not that many, but enough so that I know the pattern completely off by heart now.
Here’s the first one, in case you’ve forgotten. I didn’t share this photo in the original post as I’d completely forgotten about it… then before I got a chance to make some more, a friend talked me into selling it to her. So, believe it or not, I still don’t have one of my own!
Yarn used: 1x Scheepjes Invicta Colour 959 and 2x Scheepjes Invicta 1401
Anyway, I thought I’d do a catch-up on some of the ones I’ve been working on since then. You can find the pattern for the shawl here on Ravelry and I will continue to let you know the yarn colors as we go. These have all been made using variations of Scheepjes Invicta Colour and Scheepjes Invicta solid. I’ve added some tips at the bottom if you plan to have a go at the shawl yourself. I’ve gotten a lot of messages from people that get stuck and I will share here what I tell them.
Right, so after doing the first Dreambird, I had a request to make one using a mixture of red and grey colors. I really wasn’t sold on the idea of using a mixed colored background as I thought the feathers wouldn’t stand out as much, but the results turned out quite lovely.
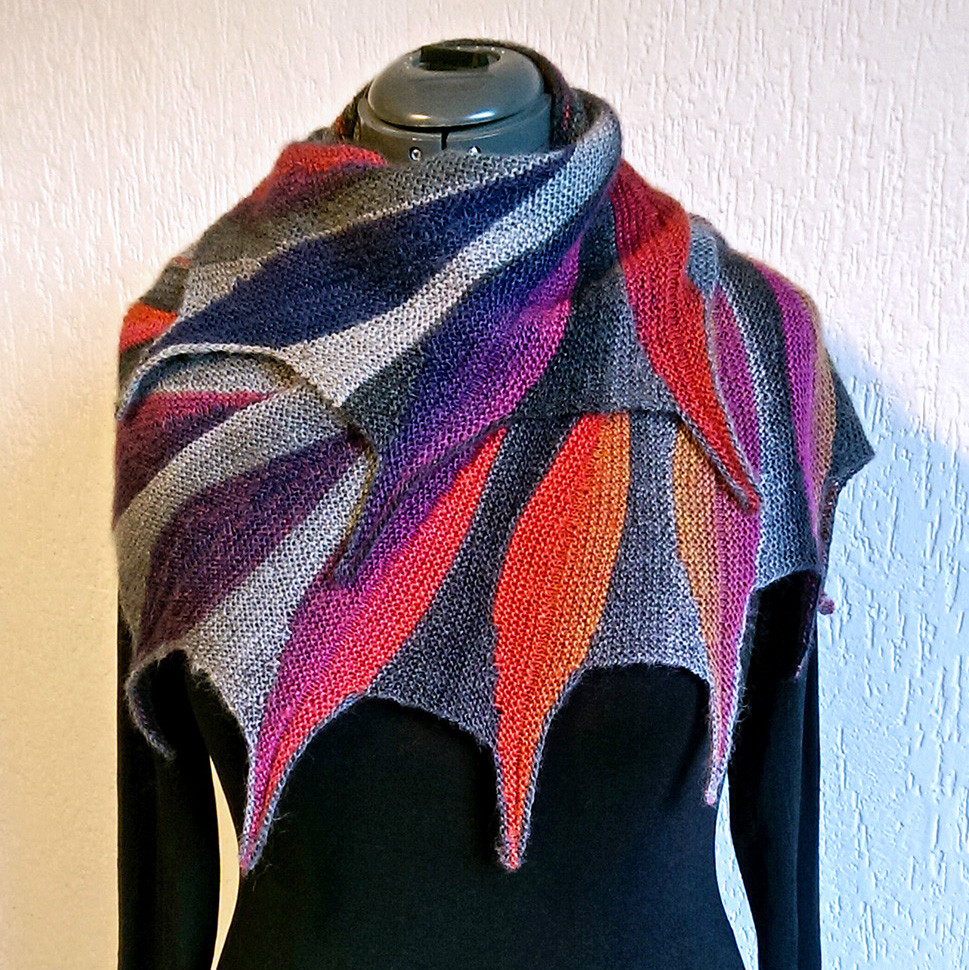
Yarn Used: 1x each Scheepjes Invicta Colour 951 and 971
I was surprised by how much I liked the results. To be perfectly honest, I thought it was going to be a dog’s breakfast but it turned out great. The person who requested it obviously had more vision than I did because I’d have never come up with this idea myself.
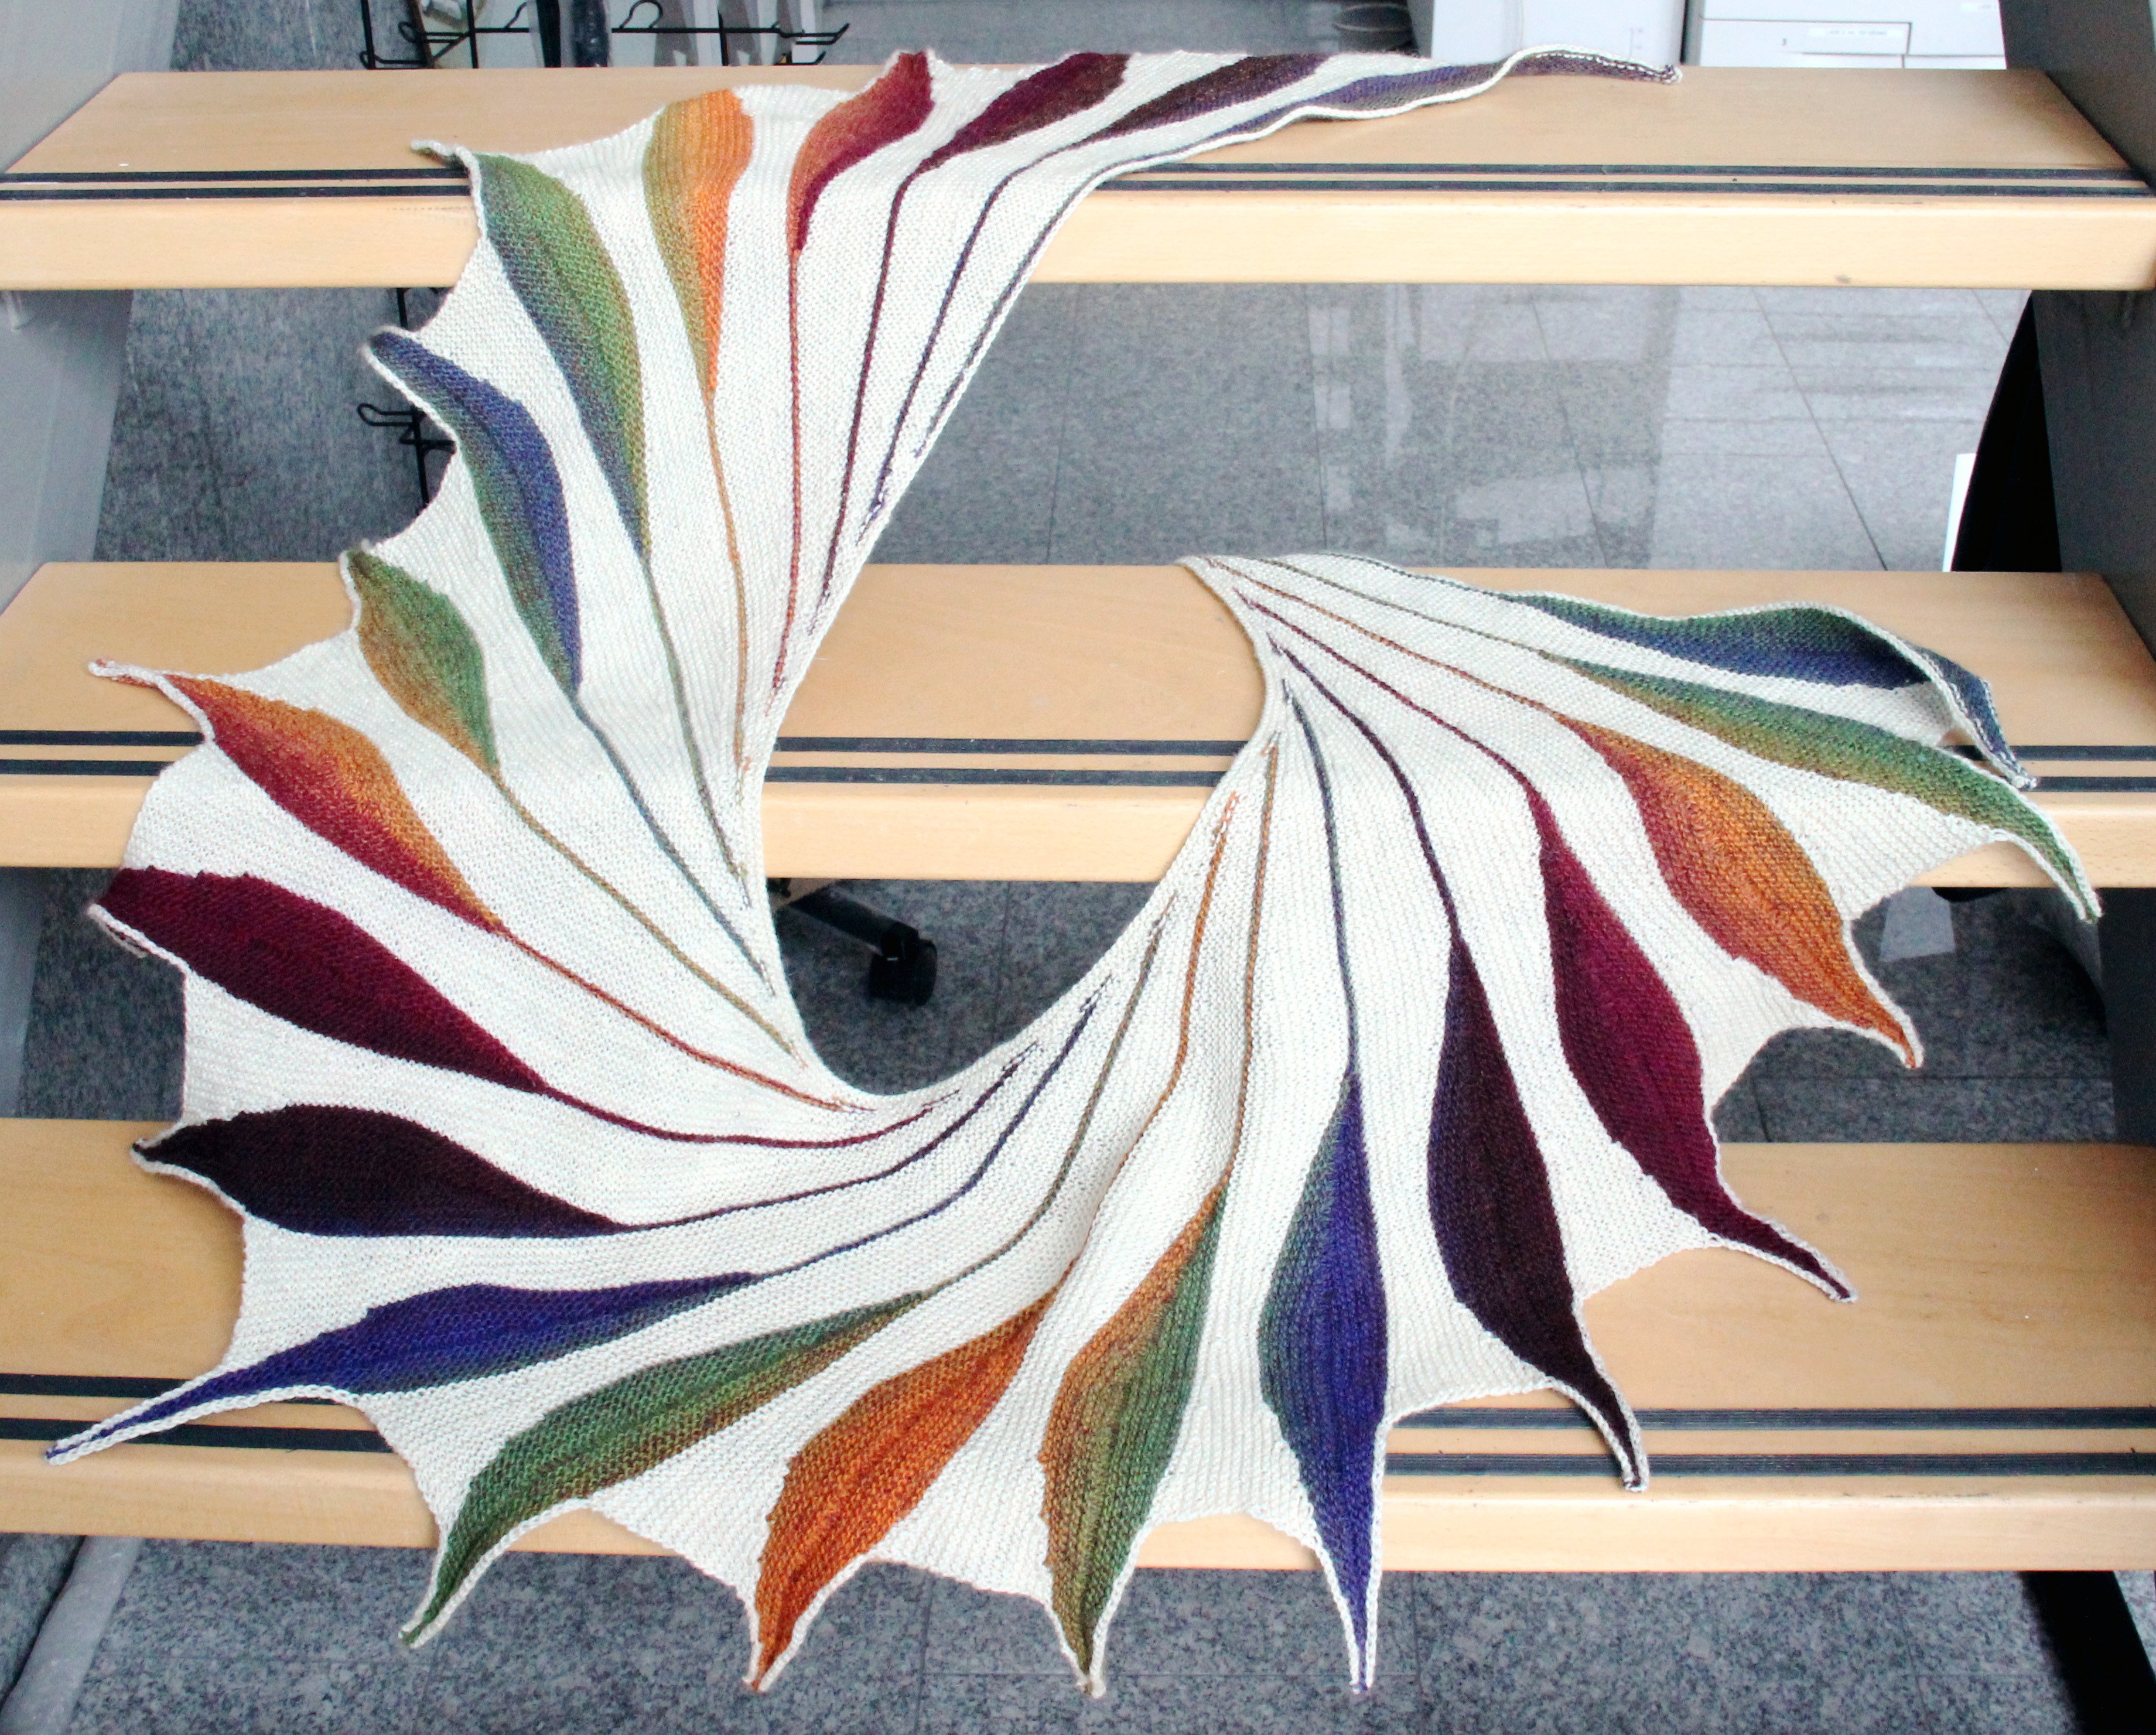
One of the most common combinations of colors for a Dreambird on Ravelry is rainbow. I’d wanted to make one anyway so when someone else asked me to make one for them, I had the chance to try out a rainbow yarn I’d once used for a pair of socks that I was sure would be perfect. It turned out I was right, because once I made one and people saw it, the requests for a rainbow shawl started rolling in. So much so, that it felt like I worked on almost nothing else for a few months. It’s a popular one, for sure and I mean, who doesn’t love rainbow, right? I don’t have individual photos of each one, but this should do.

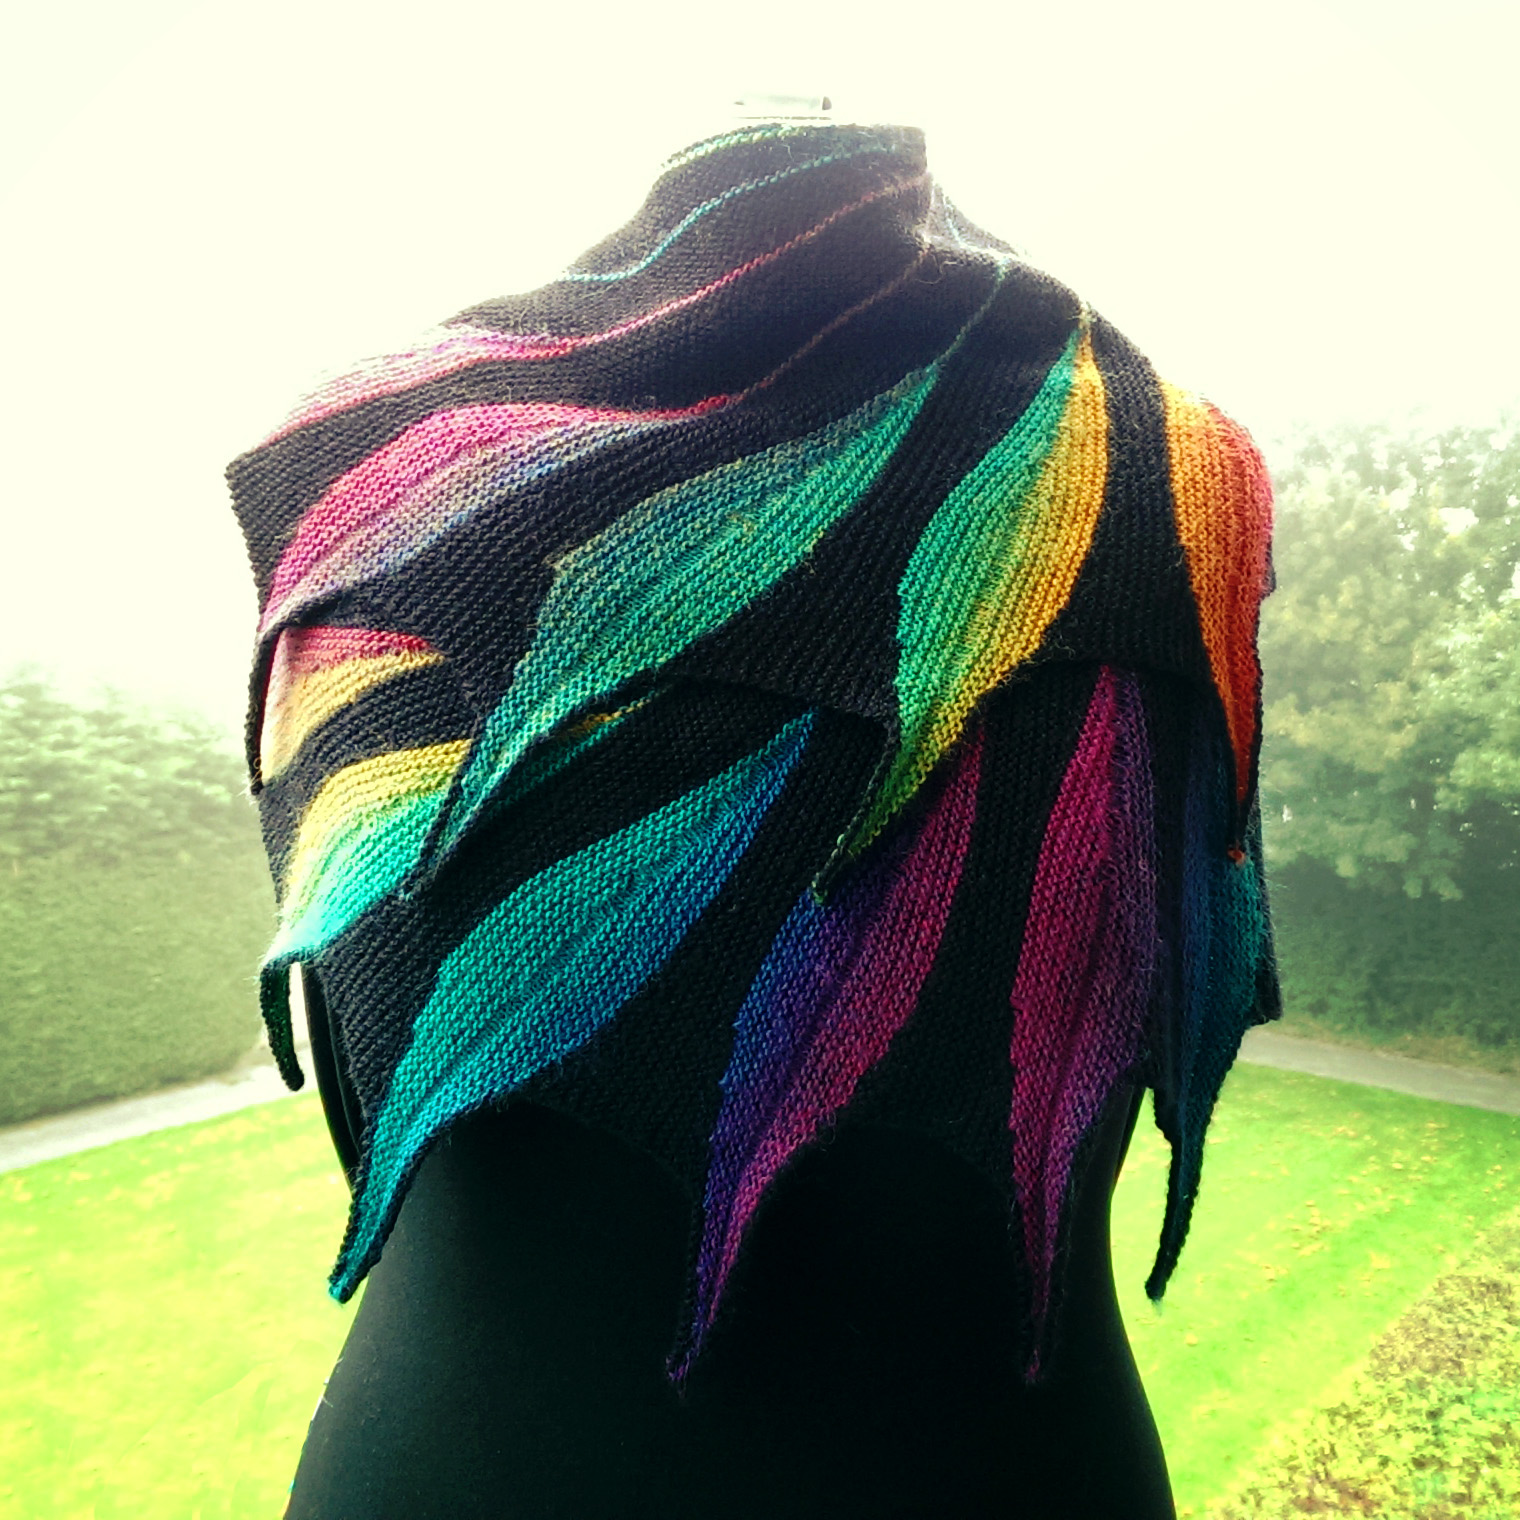
Yarn Used: 1x Scheepjes Invicta Colour 958 and 2x Scheepjes Invicta 1331
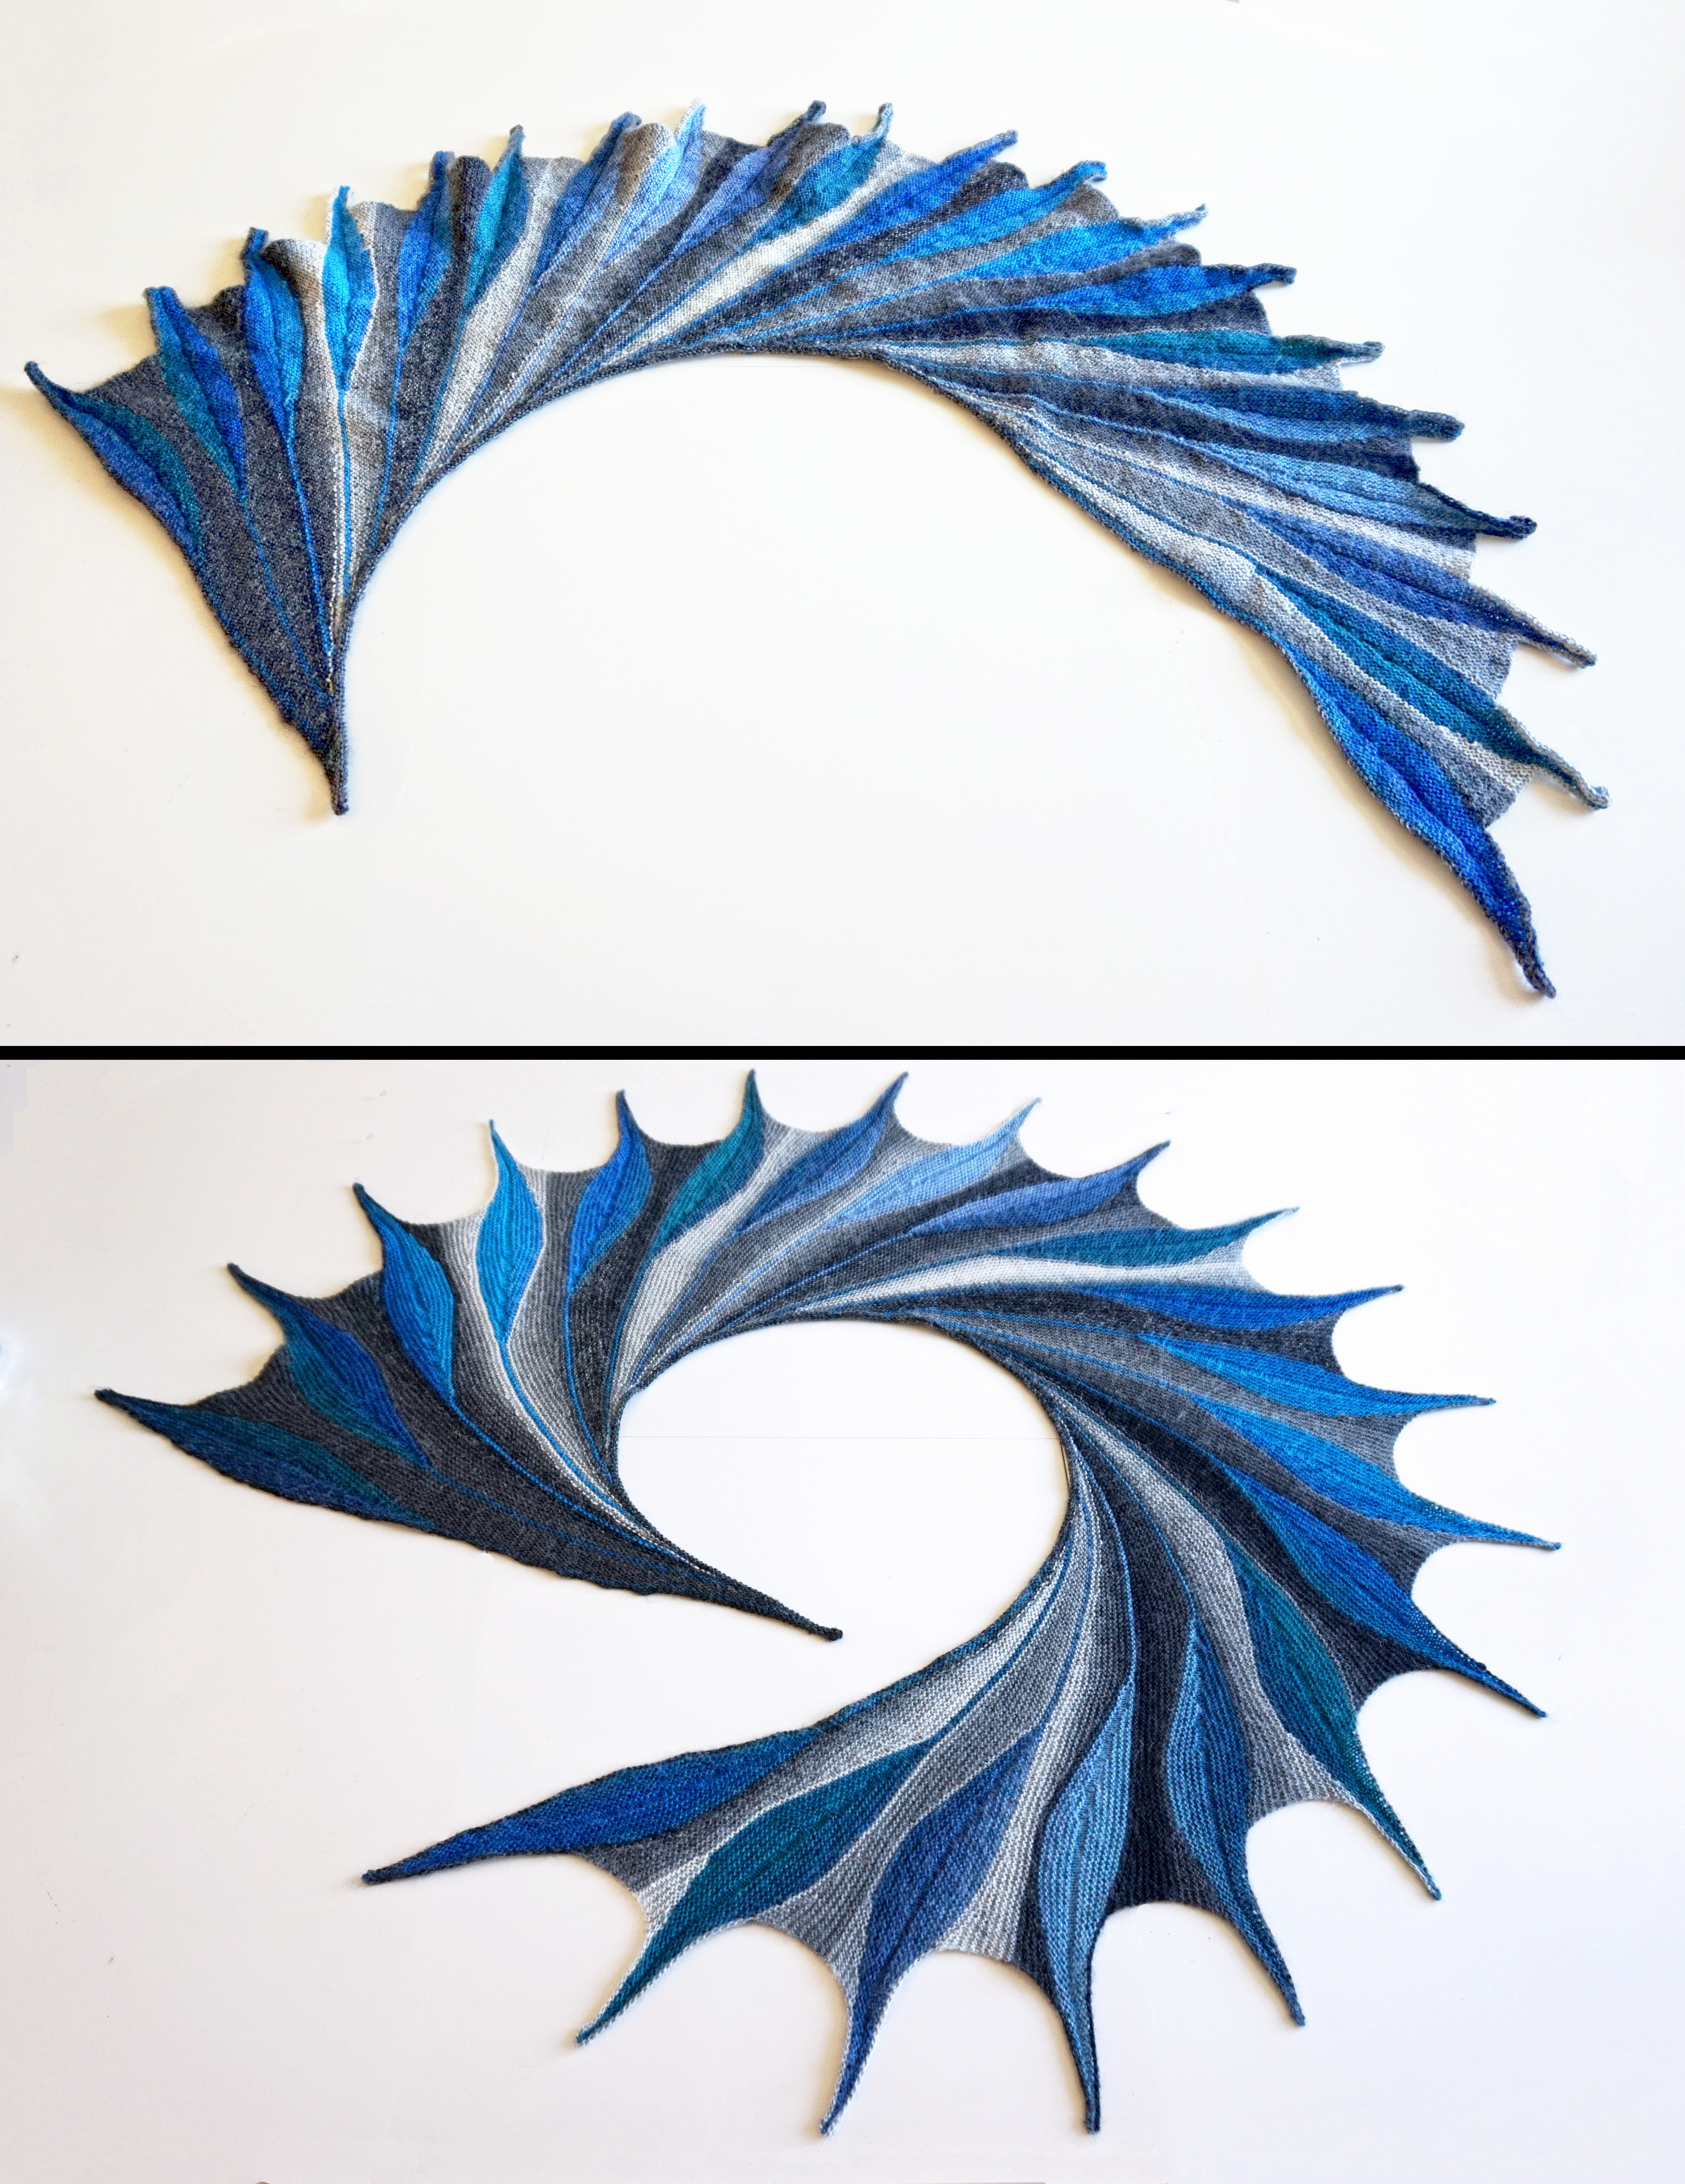
My latest was completely different again. A friend had seen the mix of red and greys and wanted something similar in blues, to look like the colors of the sea. I really liked seeing this one unfold as the blues really popped even with the background. I had taken this with me to work on while I was on our cruise and whenever looked at it, it reminded me of the water in the wake of the ship.
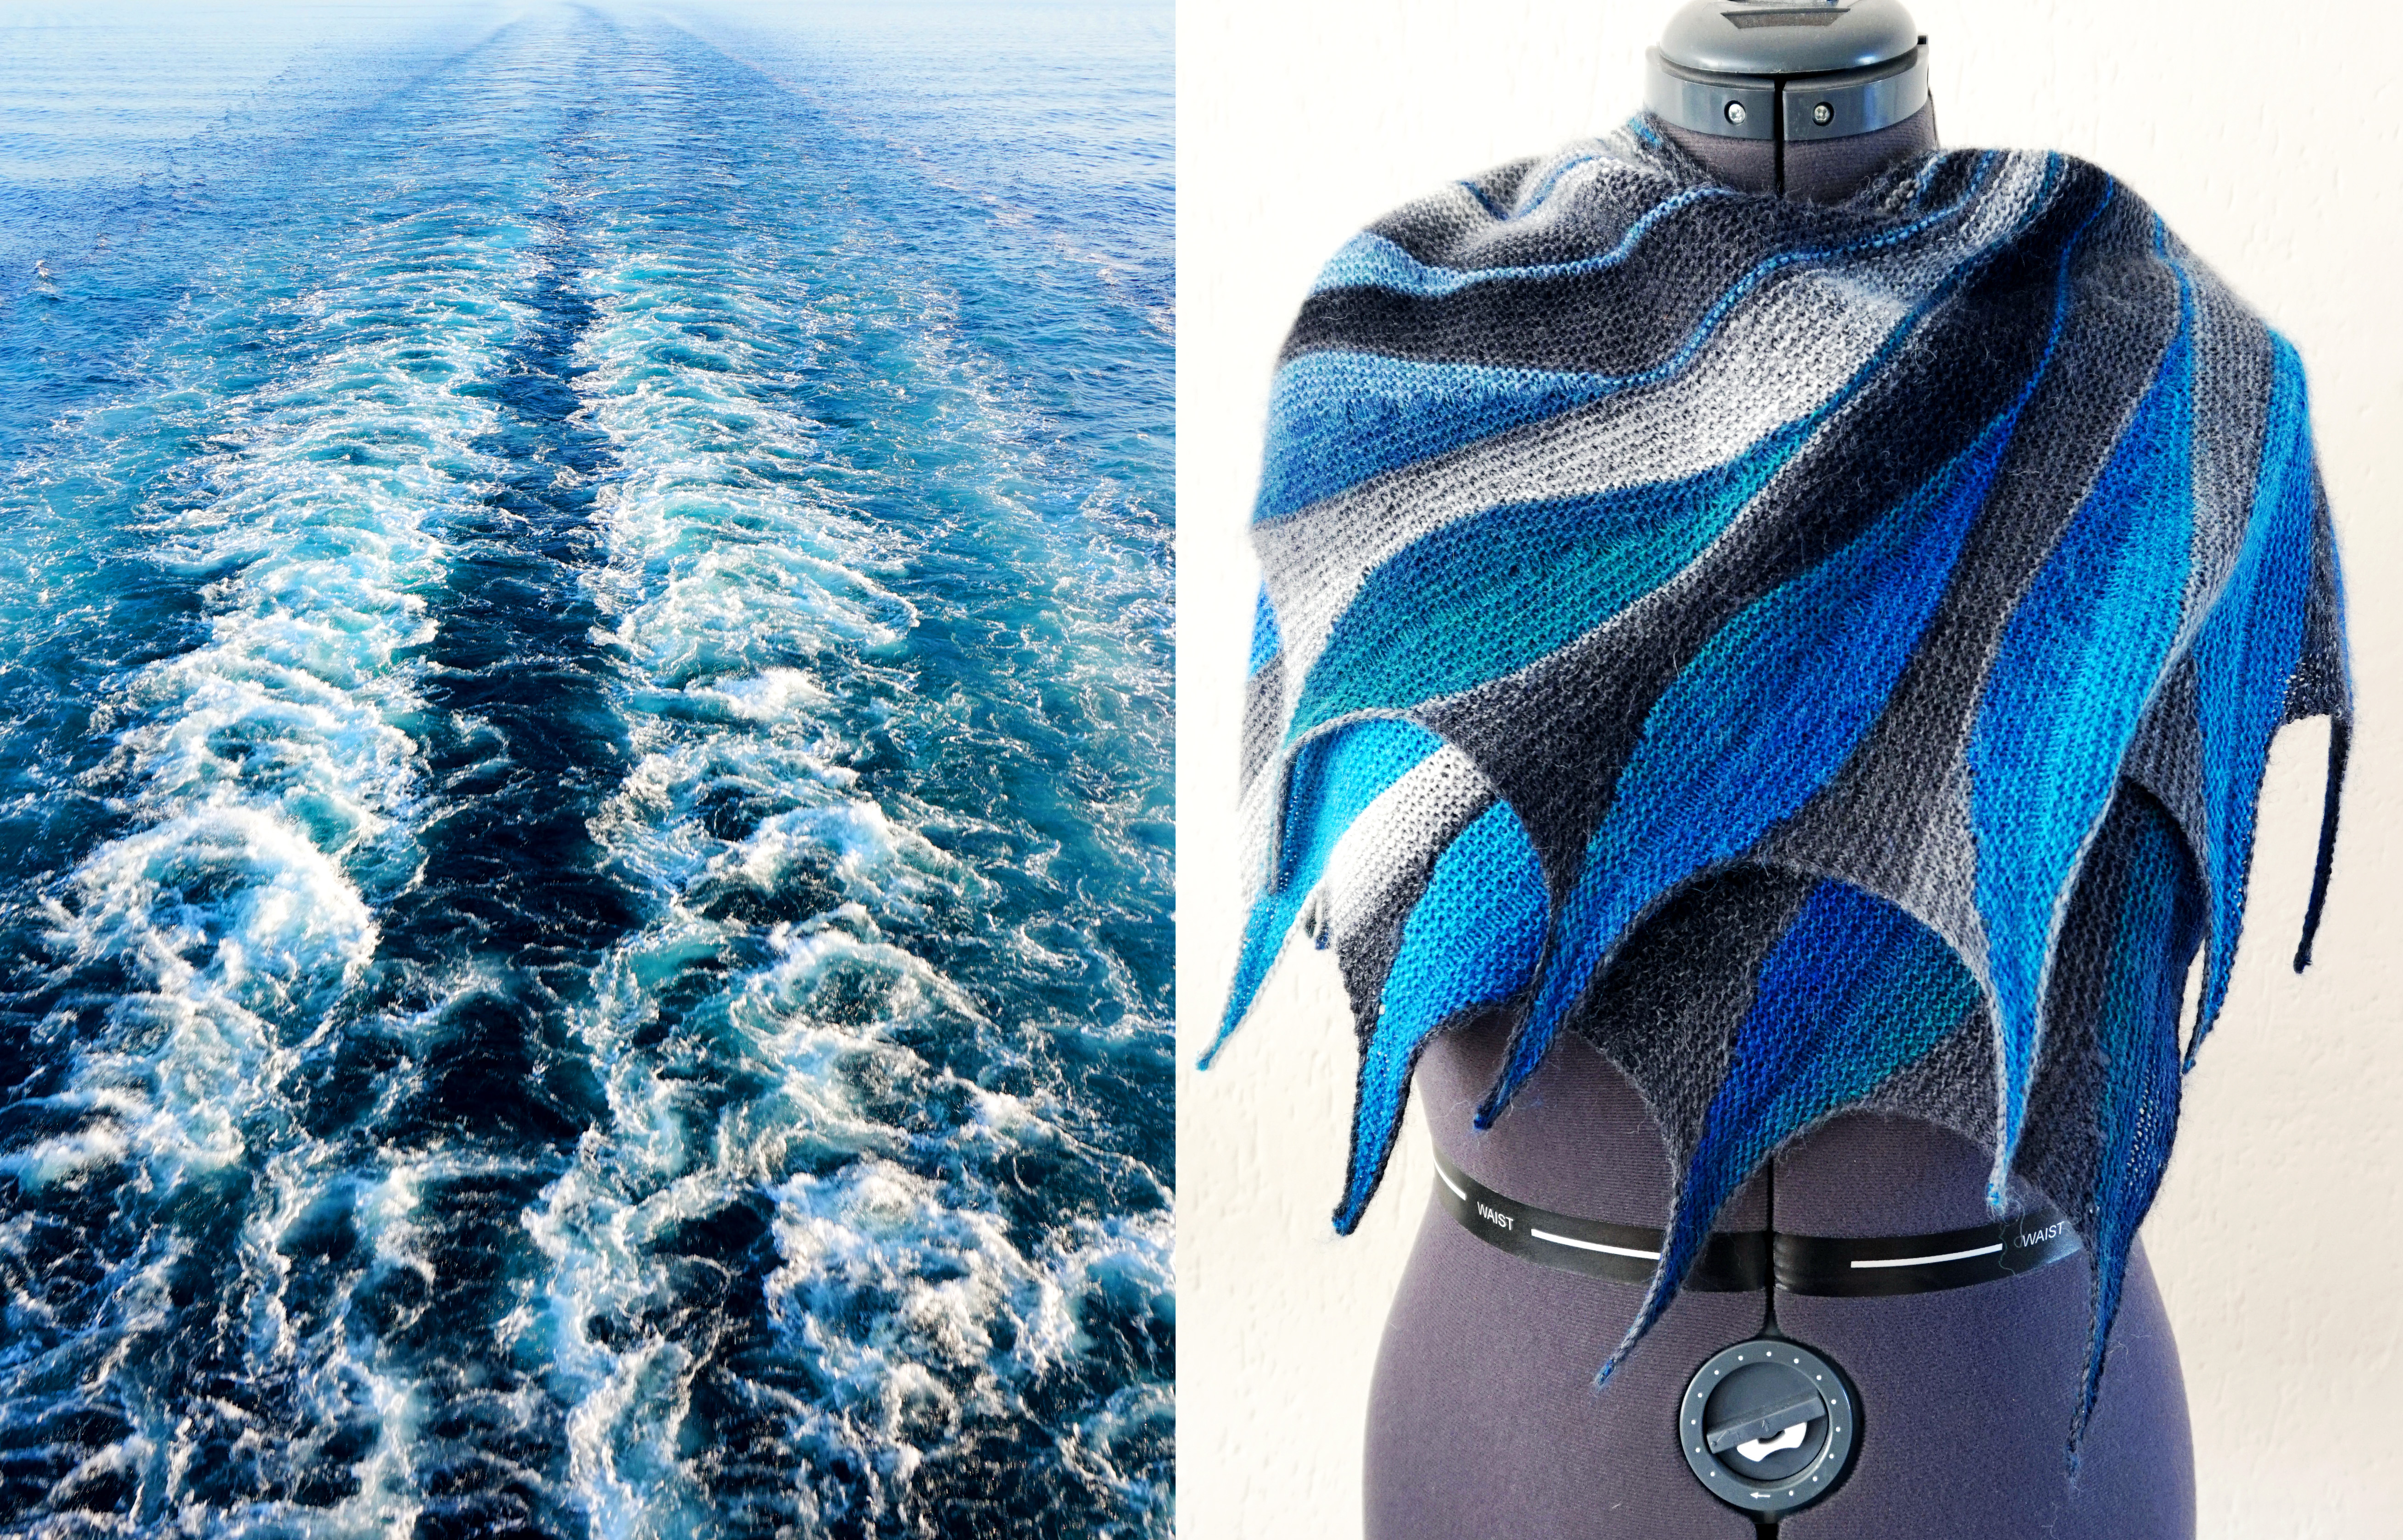
Yarn Used: 1x each Scheepjes Invicta Colour 951 and 972
So that’s it up until today. I’m working on another at the moment but it won’t be finished for a little while yet. It’s hard to believe that what was once this crazy difficult pattern is now my easy-going TV knit and that I know it by heart. I’m glad I get a break in between for other projects, though, because I was getting dangerously close to burning out on this one. I will post my next one when it’s finished!
I’ve been asked a lot about tips for this shawl and here is the best advice I have to give.
1) Only pay attention to page 16 of the pattern. It’s 22 pages long and it just confuses you if you try to take it all in. Page 16 is short, to the point and is all you need.
2) Unless you are at the very end of a row, you are making a short row and you need to do a wrap and turn or German short row (my preferred method, you can find a tutorial video here.).
3) Use stitch markers! I use groups of same-colored stitch markers to mark certain sides and points in the pattern. For example, for each turn that takes place 5 stiches -before- a previous turn, I use a pink marker. For the turns that happen 5 stitches -after- the previous turn, I use white. This may sound confusing but once you get into the pattern it will make sense. Just don’t be afraid to use markers! It can make all the difference in keeping track of where you are in the pattern.
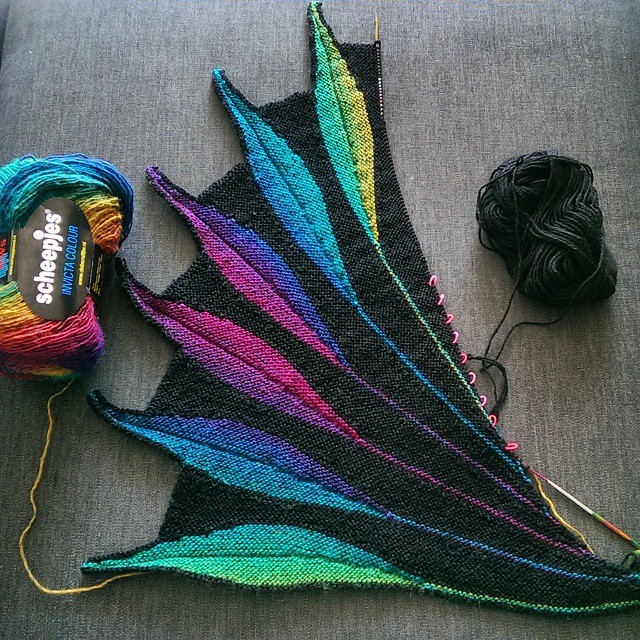
4) Make notes for yourself. I have notes that help me make sure that I am on track. For example (you can see this in the second photo of the rainbow shawl), at the end of one section I have 9 groups of 5 stitches separated by pink stitch markers. If I get to that point and count 9 sections, I know I’m still good on my count. These little notes help keep you on track and stop you from having to count every stitch of every row.
5) Lastly… relax and don’t let the pattern overwhelm you. Take it row by row and watch it unfold. If you try to take in the entire pattern and make sense of it before you begin, it will seem overwhelming. It’s really not. Good luck!
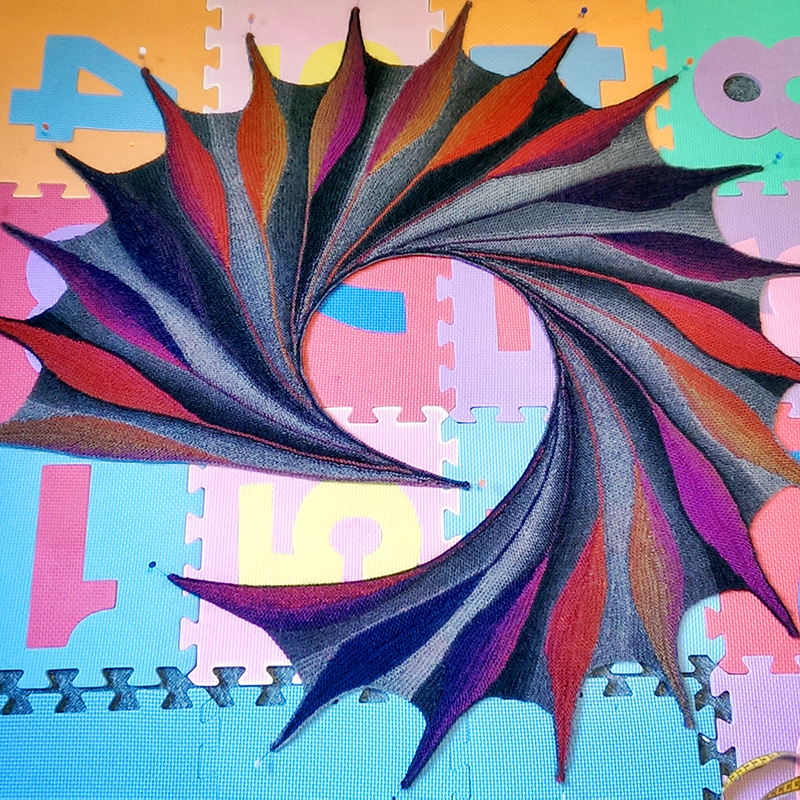
6) One last, but very important tip? BLOCK, BLOCK, BLOCK!! I know I harp on this a lot, but there’s just no way to stress this enough. Here is a photo that shows what blocking does for this shawl. If you aren’t blocking it after it’s completed, you will never see its true beauty!
You can buy this yarn at any of the Scheepjes retailers found here as well as internationally via Wool Warehouse*.
*Affiliate Link

Hi! One question, do you know where i can find a tutorial on how to knit the final border of the shawl? I found a video on how to pick stitches vertically in order to knit a garter stitch border, but not on how to do it horizontally. Thanks for any tips!
I just found this pattern on Ravelry and when I googled Dreambird for more info, I came across your blog. I’ve only been knitting 1.5 years, but my new goal is to make a Dreambird wrap as beautiful as one of yours!
Fantastic!