
Hello! I’m so excited that it’s my turn to take part in our blog hop for the new YARN Bookazine, FOLK Edition! You have probably hopped here from Esther’s blog hop post from yesterday, but there have also been some other great posts along the way! In case you missed any, you can find previous ones here on the Scheepjes Facebook page. There are 17 designs in total from 13 designers and I will share some of my favourites with you a little later in this post.
Scheepjes is also hosting a giveaway during the blog-hop, click the photo below for more information!
I have lots I want to share with you about my contribution, inspiration and the journey along the way. This project in particular was a rather epic journey for me and I don’t even really know where to begin. Actually no, that’s a lie, I do know where to begin because I put it in the title of this post.
It all started with a pie…
I sort of laughed when I typed that because it reminds me of a TV show where they go back in time to show a story leading up to their current events. Sort of like on How I Met Your Mother. “Kids… it all started with a pie”. Did you also just hear his voice in your head when you read that?
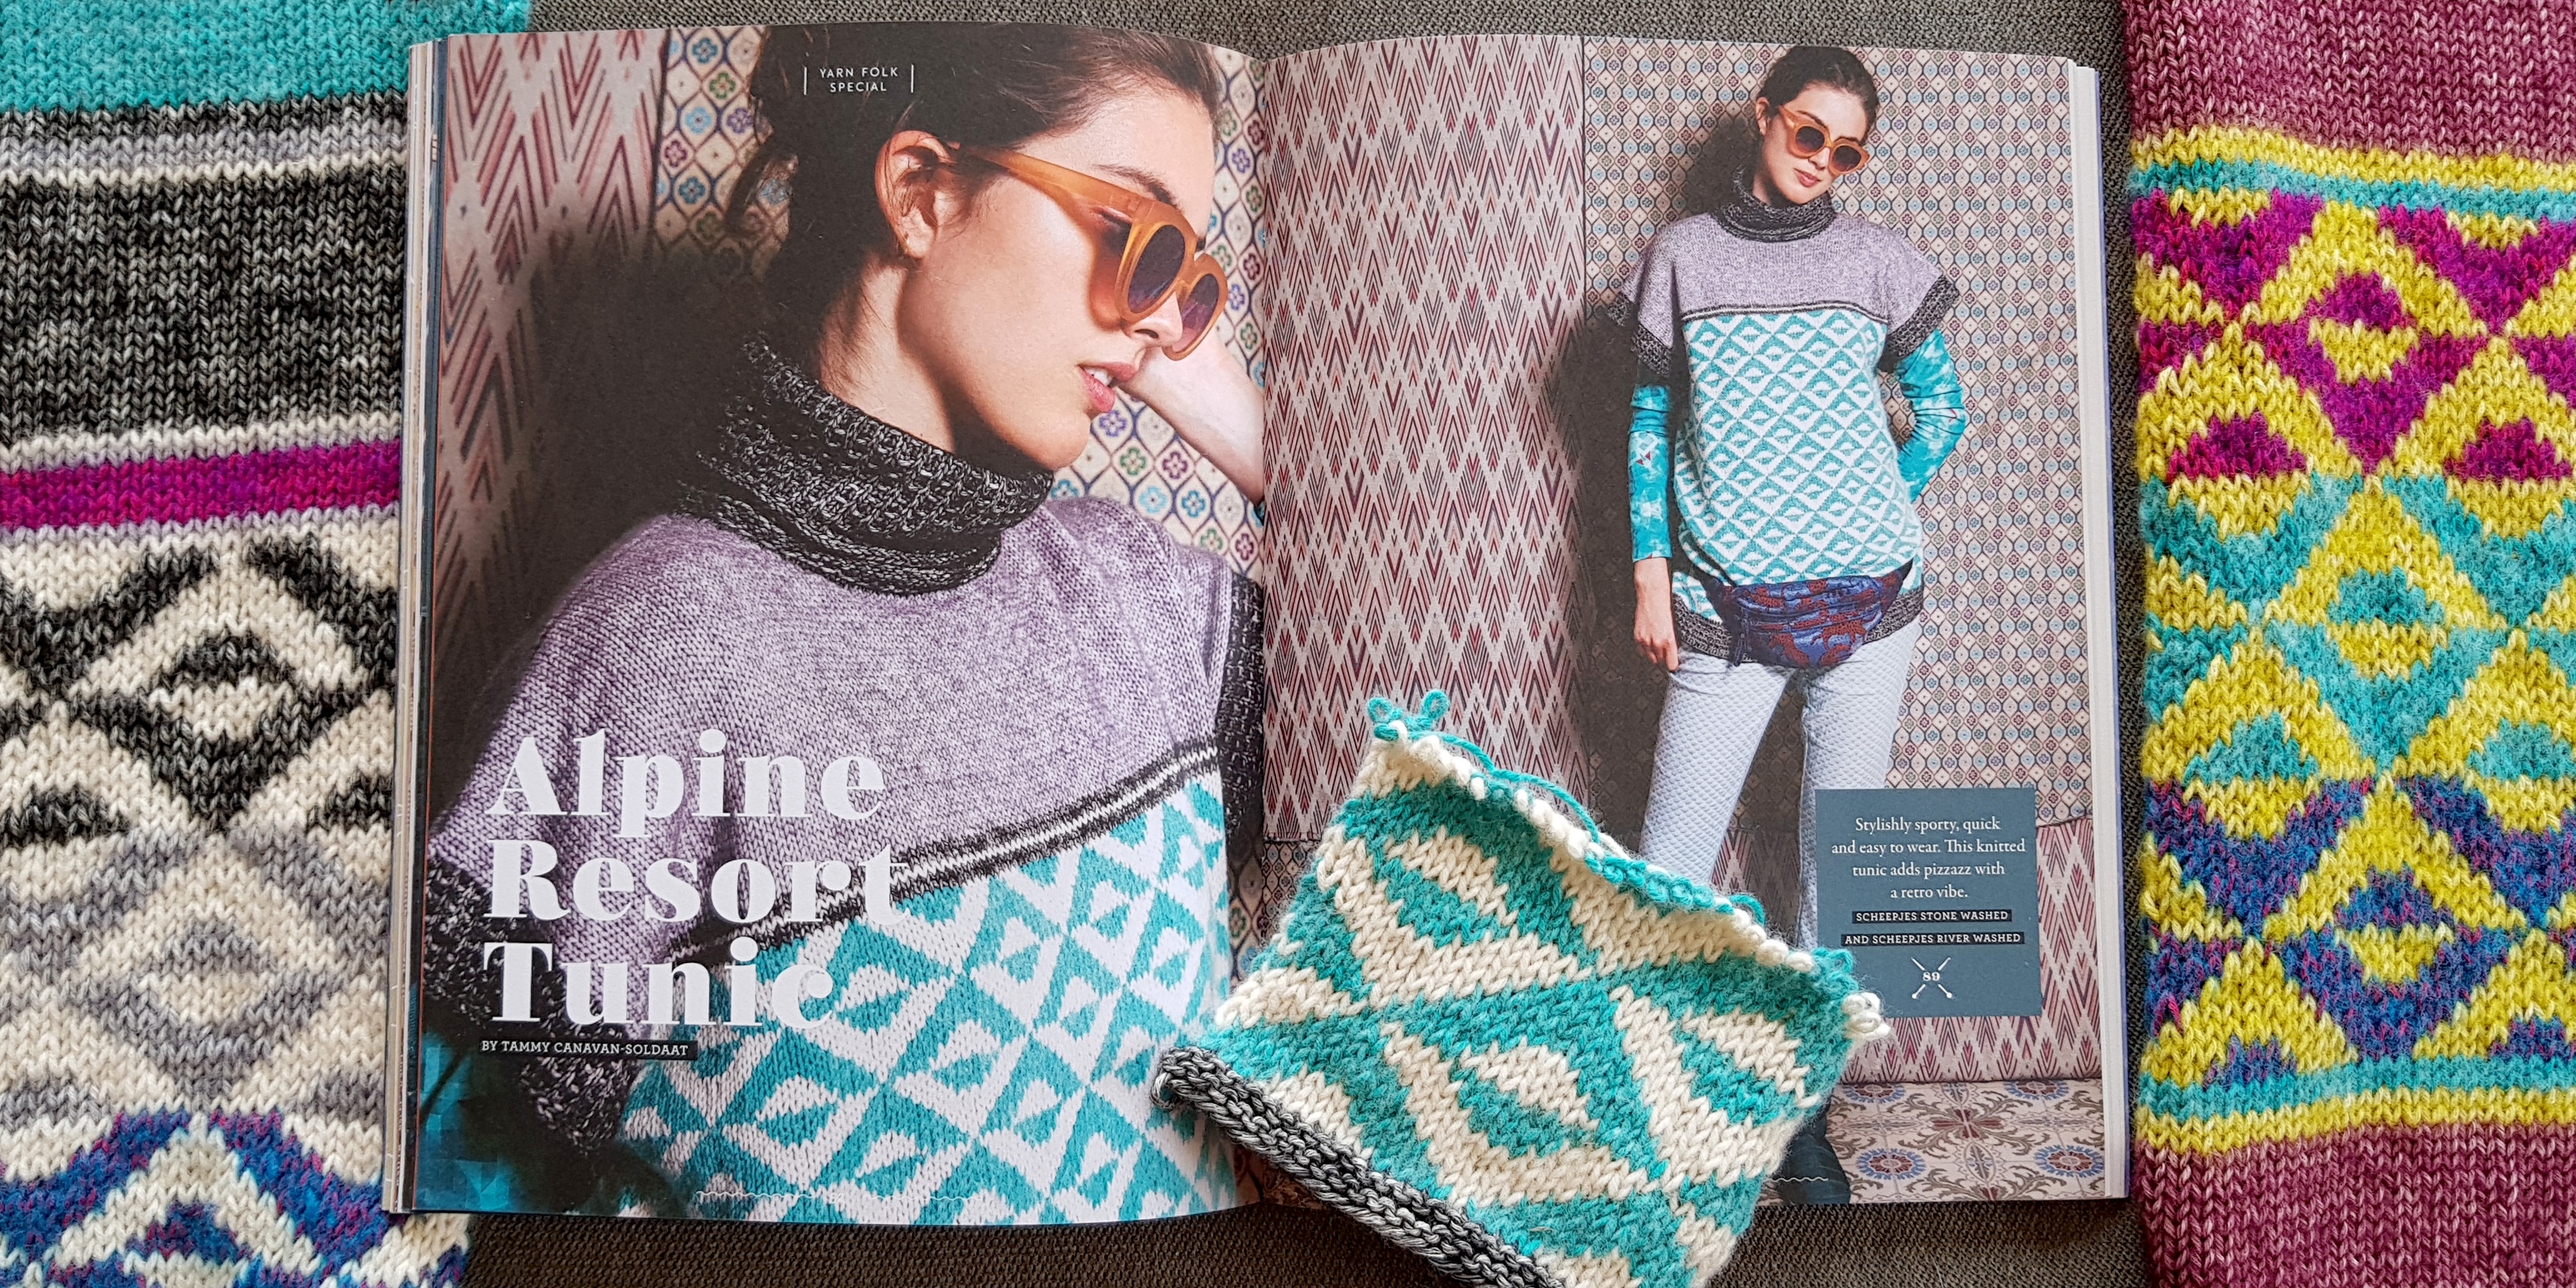
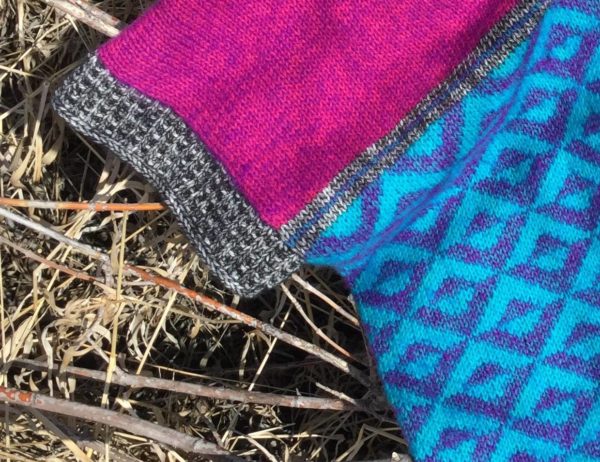
When we were given the theme for this YARN issue, I knew I wanted to do something with colour work. I went through a few ideas, I tried to come up with some traditional Fair Isle patterns (which apparently I suck at royally, it was not pretty) and was getting really frustrated. For someone who enjoys colour work and was so happy about this theme, I was really struggling with ideas! Then I saw it… the inspiration for my Alpine Resort Tunic… the pie.
https://www.instagram.com/p/Bb99vbHlAjd/
I knew the minute I saw it that this was it, this was what I wanted to recreate in knitting. I saved this photo, opened my knitting chart editor and got to work.
Can you see it?
It’s so funny where we find our inspiration, isn’t it? I tried so hard to pick something out of the air and create a pattern, but got nowhere. It was only after I got frustrated and started going into avoidance mode that I was inspired while mindlessly browsing Instagram. I think sometimes we need to not push so hard to make it happen and rather sit back, relax and let ideas just happen, ya know?
Granted, that wasn’t the end of the story. I had a pattern idea but how did I want to incorporate it? My original idea was to do a very simple tunic with a block of pattern work on the chest. Originally, I was going to do the pattern work in multiple colours, perhaps in a gradient, but I eventually changed my mind. I also gradually worked my way from a block of pattern, to all pattern, to partial pattern. When I’m designing I always find the process goes more quickly if I mock up ideas in photoshop or on paper. You can see a bit of the process below.
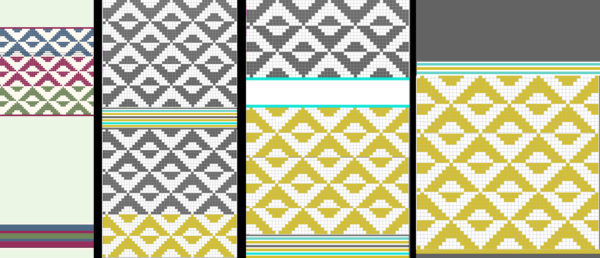
In the last photo on the right you can see the idea starting to take form properly. Once I had that idea, which I was working in random colours, I had to decide which colours to use and how I wanted to work the stitches for the bottom and sleeve bands, neck etc. My process then also involves a little photoshop, together with some swatching. I basically knit a small swatch and then cut and paste pieces together to get an idea of what I want the finished piece to look like, approximately.
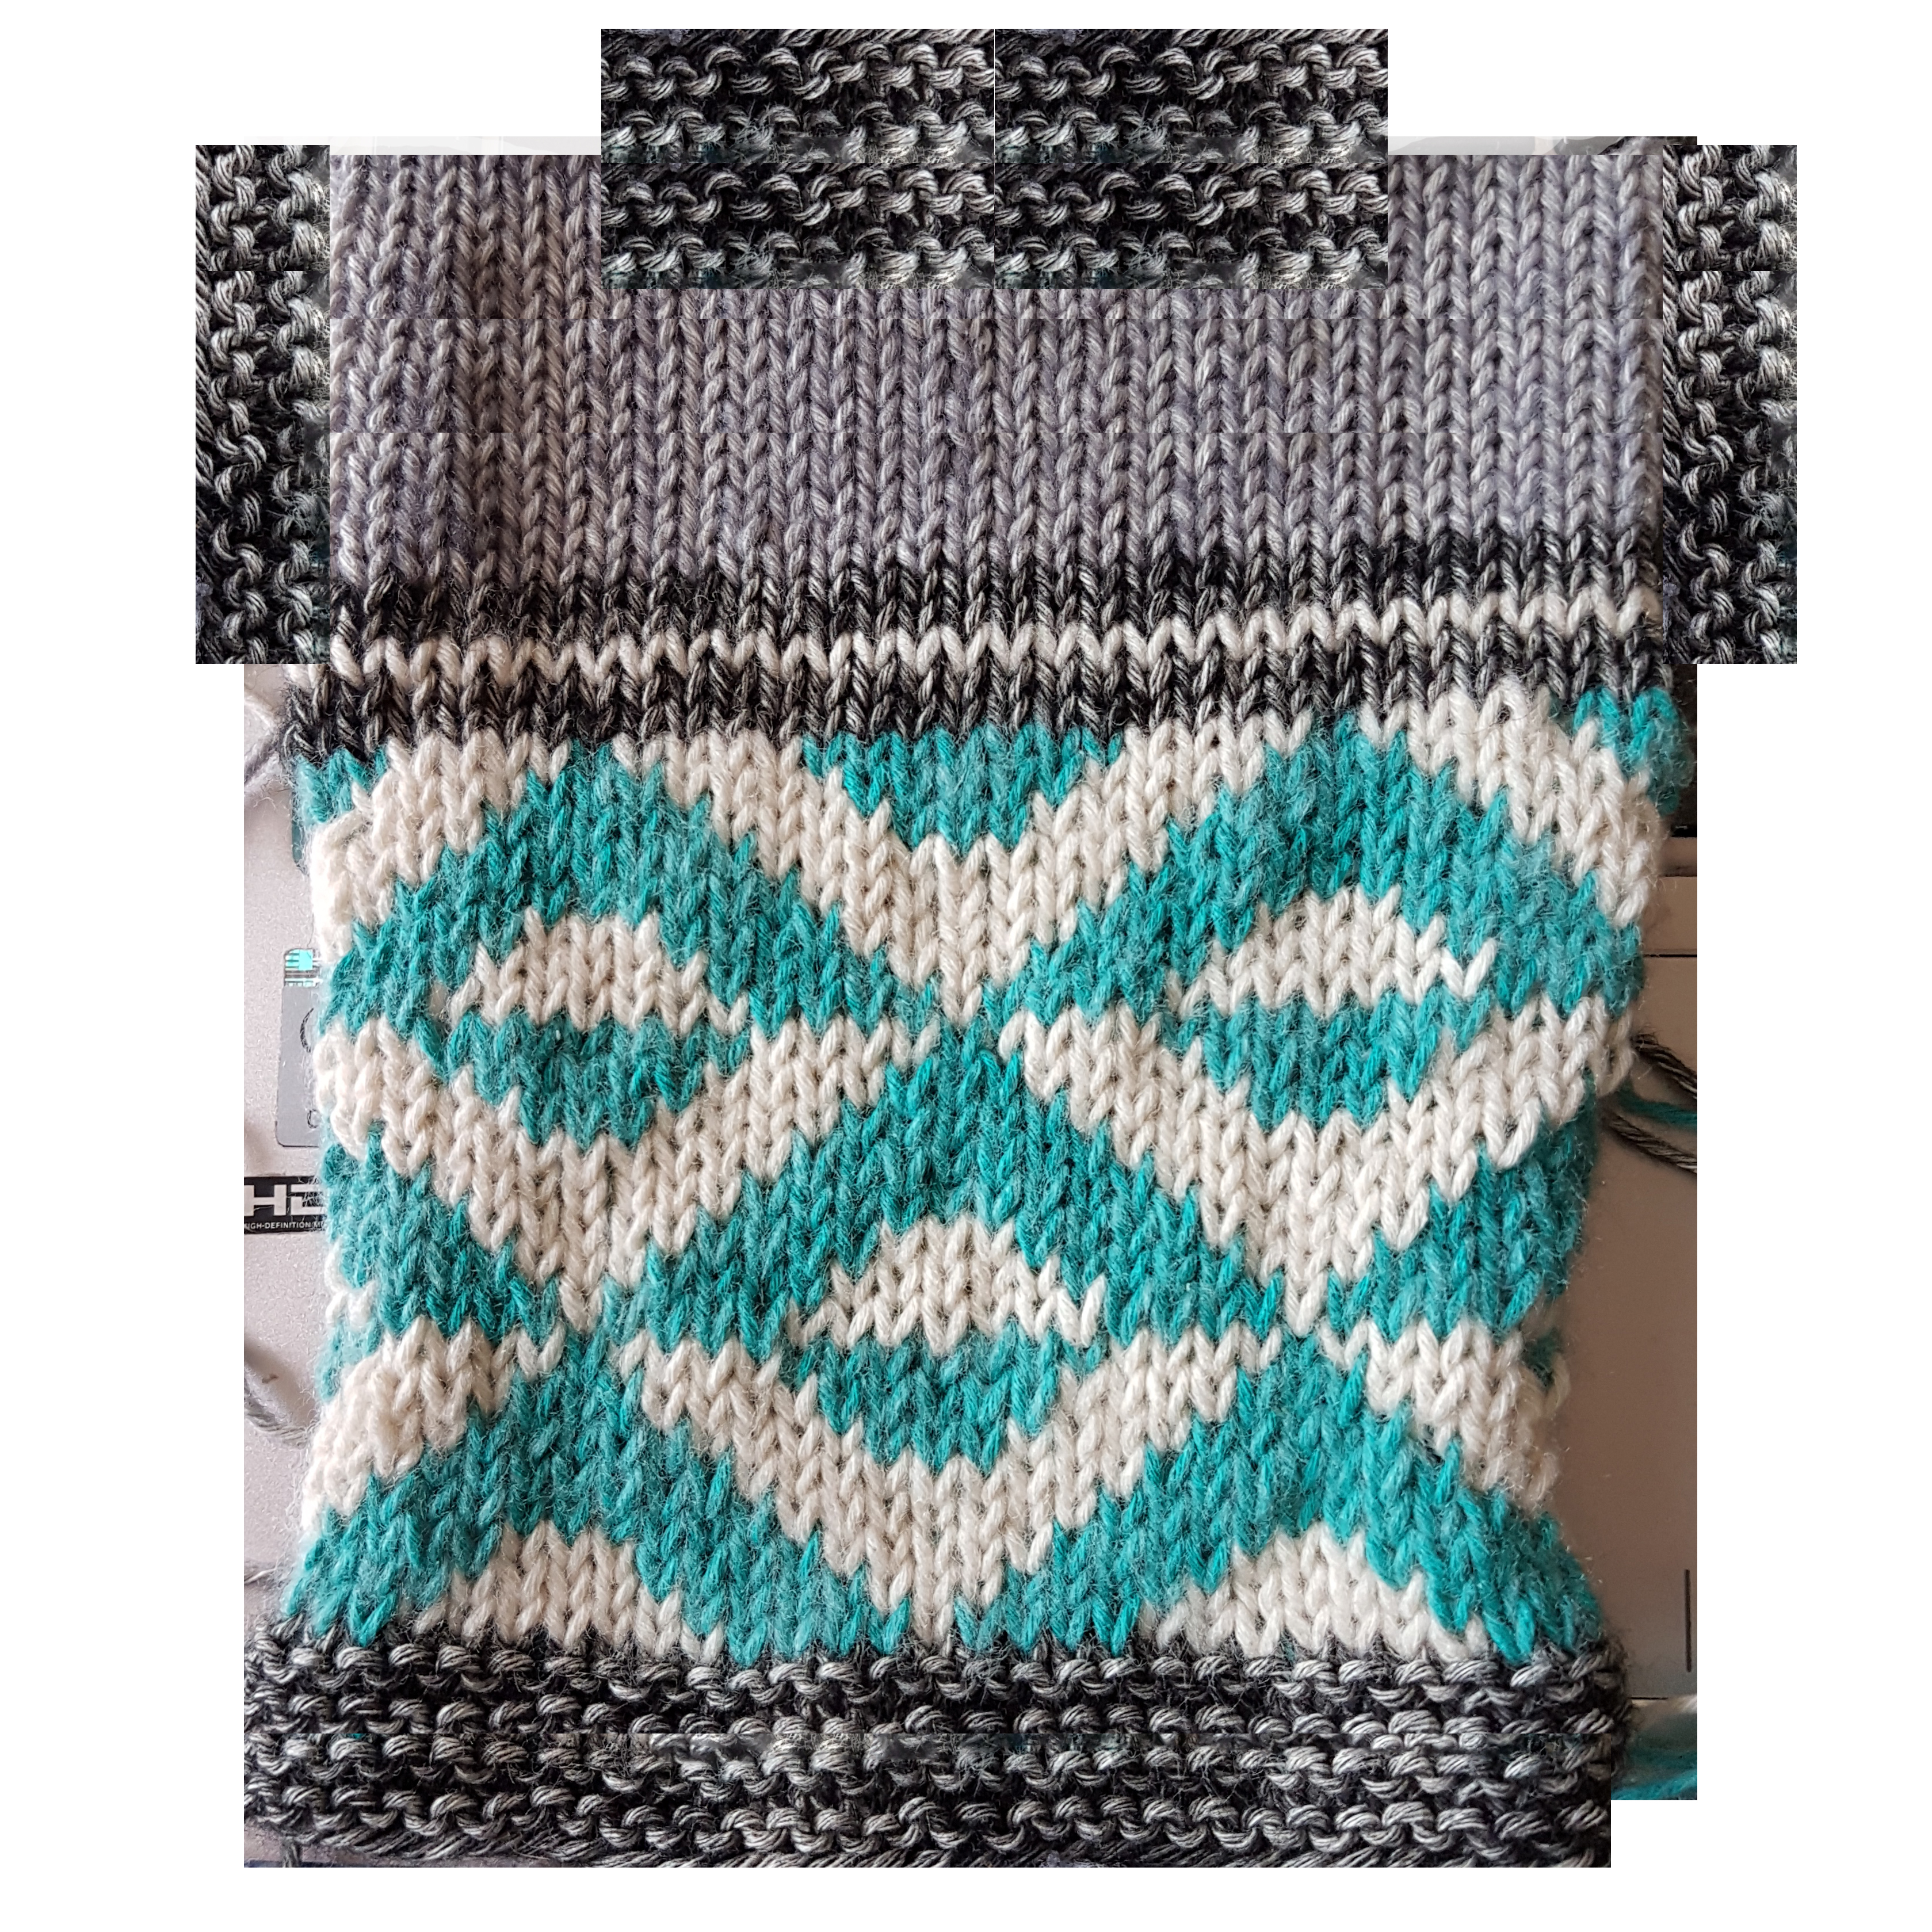
OR… I completely lose the plot and swatch like my life depends on it, like you see in the photo below with a few of the swatches I dug out this morning to show you. I’d like to say this is all of them, but that would be a lie. What can I say? I obsess…
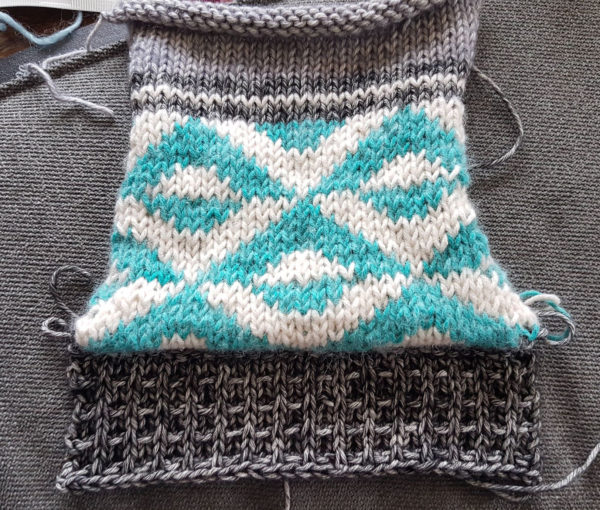
Once I figured out the colours I wanted to use, it was just one more quick swatch to get the texture of the bands the way I wanted it, and I was ready to go on the real thing!
I don’t know if you are all interested in all of these little details, but I’ve always been super curious about how other designers work and what their process is. I don’t know if my process is unique to me, because sometimes I feel like I overthink things, but it’s what works!
This was my first garment design so I wanted everything to go right. I was also suffering terribly at the time with the worst (frozen) stage of my frozen shoulder, and was knitting a bit like a one armed sleepless bandit! If you aren’t familiar with frozen shoulder, your shoulder basically gets sore and eventually just quits on you, painfully stuck and unable to lift or move your arm. If you do try to move it, pain explodes in your brain and you basically start considering amputation as a viable option. I was sleeping approximately 2-3 hours a night due to not being able to get it comfortable, but I was not going to give up on this project! I was committed and was going to finish regardless of how many times I had to tear it apart due to dumb, stupid mistakes I made due to my lack of sleep and attention span.
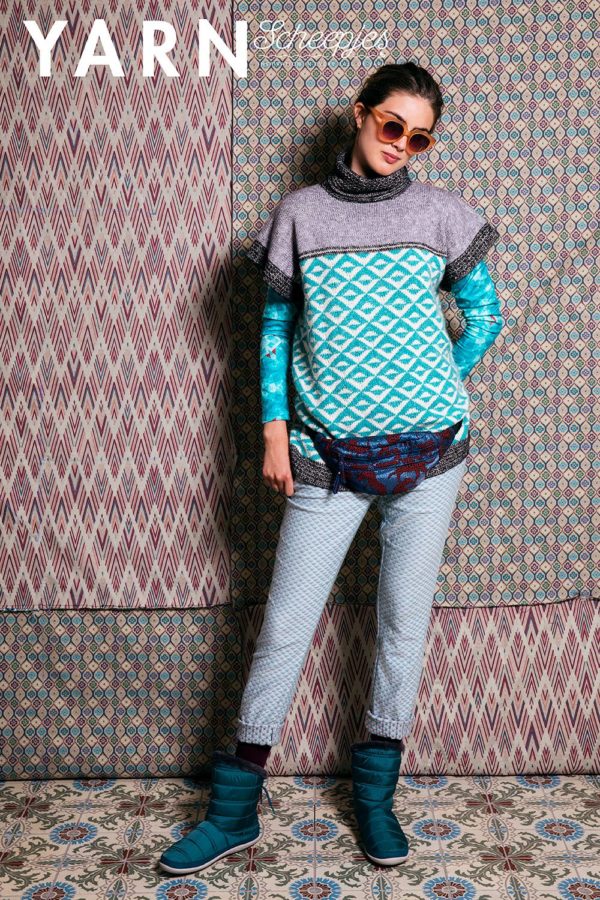
I found this photo in my files, from when I was trying it on and sending progress photos to Scheepjes, and literally laughed out loud at how awful and tired I looked at the time. I can laugh now, of course, but boy was I NOT laughing then! Not even a little bit. In fact, there were a lot more tears than laughter! I was so over it.
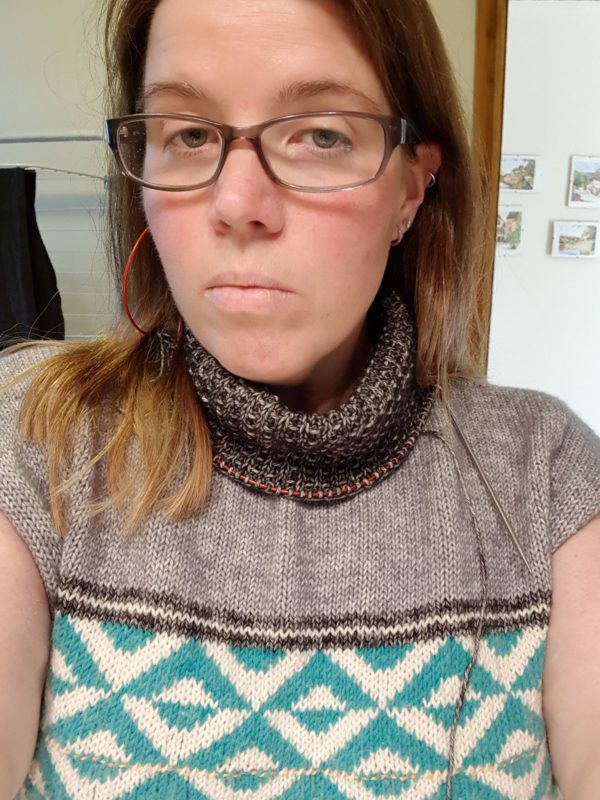
Oh my word, what an awful photo… but hey, it’s all about keeping it real, right? Notice the lifeline across my chest? I know if you interact with me at all about knitting, you know I’ll always harp on about what a lifesaver they are, and boy did they save my butt many times while making this!
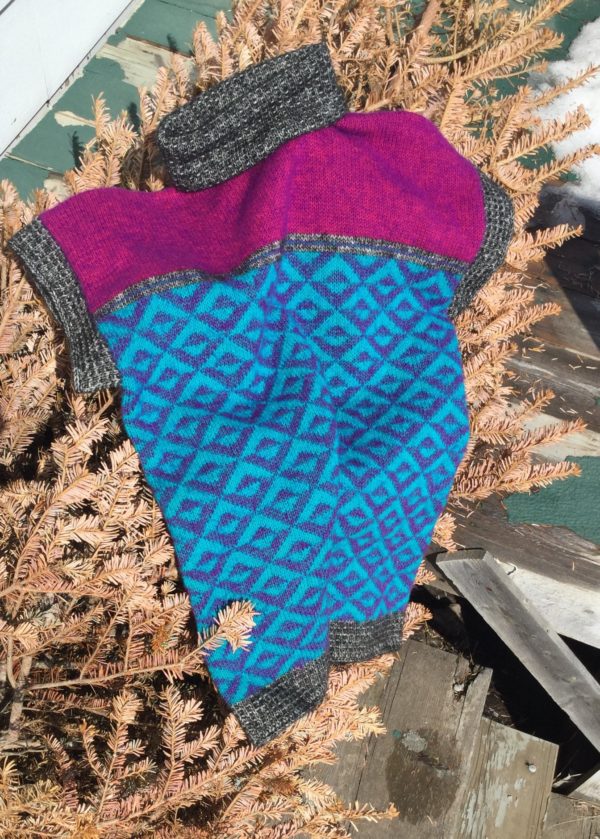
in the end, I finished, I did a little sleepy jig and sent it off swiftly to Scheepjes, as I had ended up working past my deadline due to having to tear back so much. The most important part is that I DID finish. Ok, so I was kind of like “GET THIS THING OUT OF MY HOUSE!!!” in the end, but sometimes that’s part of the design process too! Sometimes you drive yourself so crazy over something that you hate it a bit before you are able to love it again.
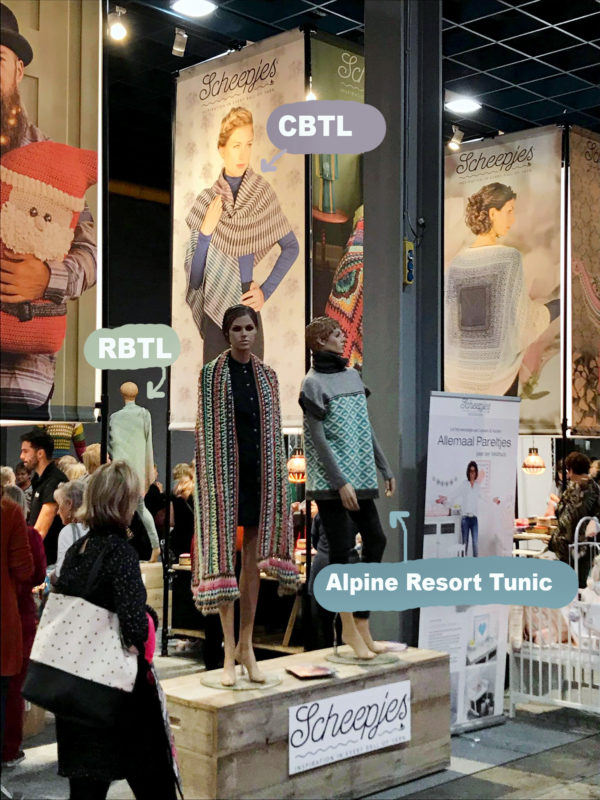
Seeing this, though? This made me love it again…having people sending me photos of it on display at this year’s Kreadoe (a very popular craft fair in the Netherlands) was just wonderful and really helped me appreciate this project again. Having my Read Between the Lines and Crochet Between the Lines with it in this photo was just the icing on the cake.
So, that’s it, that was my process in discovering the Alpine Resort Tunic, and how the whole idea began with a lovely image of a pie…
Before I get into the other projects I love in this issue, I want to give an extra special shout out to my friend and tester, Niamh from Woolly Chicken Crafts who not only tested this project for me but also served as my agony aunt, talking me off the ledge more than once after I had a tear-out tantrum or the knitting math got the better of me. She made a tunic of her own using bold, beautiful colours, have a look…
Thank you, Niamh!! ❤️
Due to printing errors, there have been mistakes in this pattern in the bookazine. Please see this post for errata information
Right, now onto the other great designs in this issue. I can’t cover them all, otherwise I’d be here typing all day, because there is so much to love. I really like the whole FOLK idea overall as I do tend to like colours and patterns. I have chosen my three favourite projects to share with you, that I plan to make as soon as I have the time. Two of them are crochet, believe it or not!
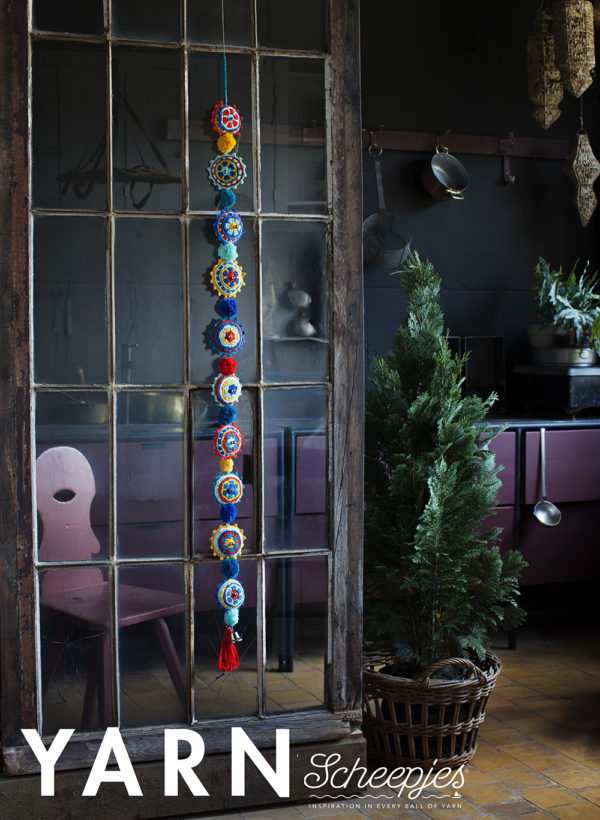
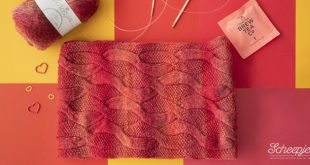
First is the Jingle Garland by Tatiana from LillaBjorn‘s Crochet. I love how colourful it is and that, at least I feel, it’s something I could leave up year round. I really want to add more colour to our house and I already know the exact spot where I will hang it! She has already posted her blog hop post about this project, which you can read here. It will probably take me forever because I snip obsessively at pompoms, is that just me? haha
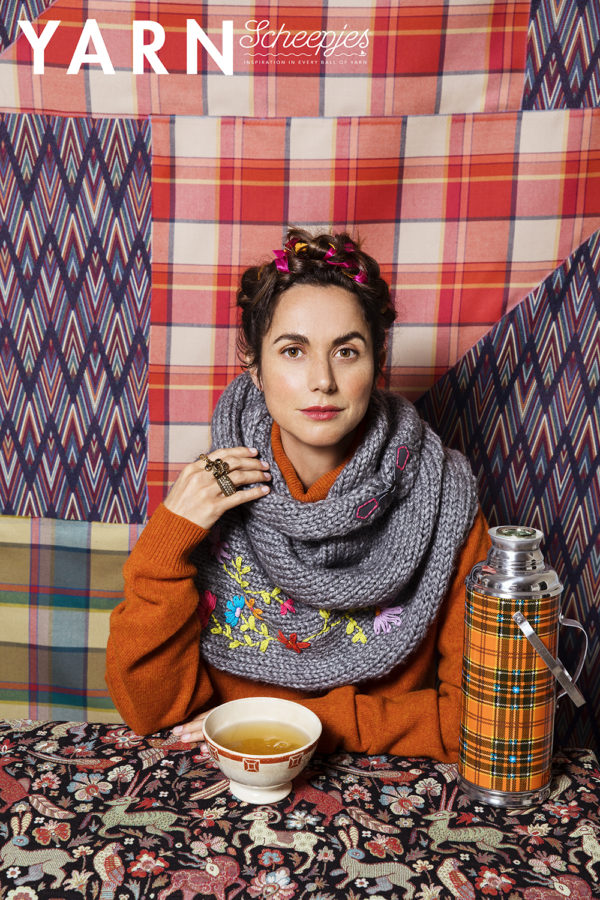
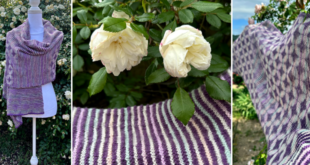
Next is the Frida Shawl by one of my very bestie of besties, Nerissa, or Miss Neriss to the crafty world. Omg, I loooooove seeing her doing designs with knit! Insert all happy dance gifs here, please! She has always been a hardcore crocheter but little by little she’s been dipping her toe more into the knitting pool and it just tickles me to death. If you know me, you know one of my missions in life is to turn everyone on to knitting, so this just gets all my happy sighs. The lovely added touches of the buckle and embroidery take this simple knit to the next level. I just love it and can’t wait to make one for myself! You can read all about her process with the shawl here on her blog hop post!
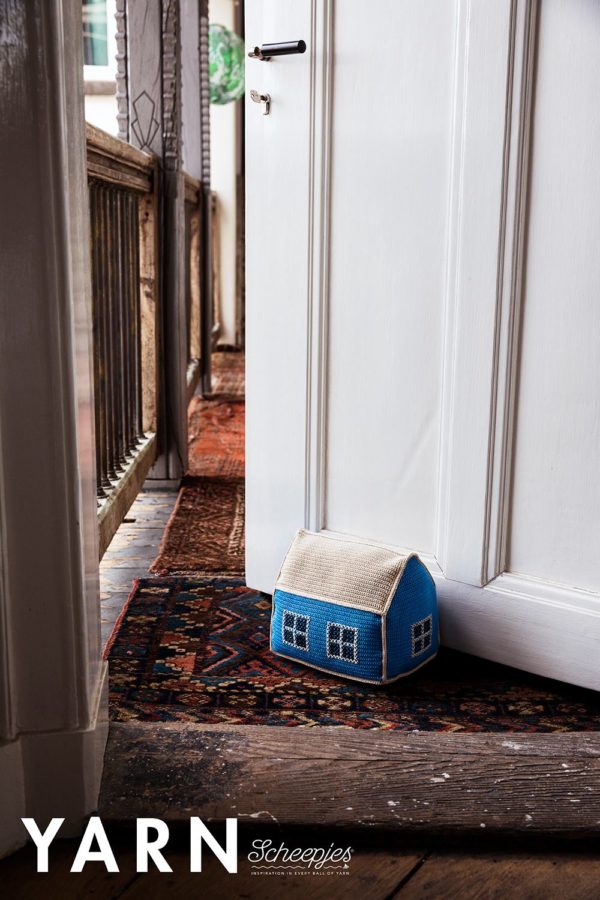
Last, but certainly not least, is the most adorable little doorstop in all the land. The Swedish Cabin Doorstop by Dedri of Look at What I Made. Squeeee, how cute is this?! We have a ton of doors in our house that I’m constantly worried about in the summer. I have these images in my head of them slamming on my dog! It’s awful! I hate just using rubber doorstops and have been wanting to create some nicer alternatives, so this is right up my ally at the moment. I can’t wait to make this (maybe multiple ones, in colours matching the rooms?!) as they’ll be much nicer than what I have going on now.
As luck would have it, Dedri is actually the next up on our blog hop, where she will be discussing this very project! So be sure to check out her blog tomorrow where we can all read about her adorable contribution to this issue!
WHERE TO BUY YARN 6 (FOLK):
UK and International buyers can find it at Woolwarehouse, Black Sheep Wools, Deramores and Habbedash.
Canadian and International buyers have a great option with Knotty House.
Those of you in the Netherlands can find all you need at Caro’s Atelier
You can also ask your preferred Scheepjes retailer or find a shop near you!
Yarn requirements for the Alpine Resort Tunic
Scheepjes Stone Washed (78% Cotton, 22% Acrylic; 50g/130m)
- Yarn A: 803 Black Onyx x 3 (3: 3: 3: 4) balls
- Yarn B: 801 Moon Stone x 3 (4: 4: 4: 5) balls
- Yarn C: 802 Smokey Quartz x 2 (2: 3: 3: 3) balls
Scheepjes River Washed (78% Cotton, 22% Acrylic; 50g/130m)
- Yarn D: 952 Rhine x 3 (4: 4: 4: 5) balls
This post contains affiliate links. This is a way for you to support Canadutch and me as a designer. It is no extra cost to you, but if you shop via one of these links, I get a small percentage of the sale!
Gorgeous design and I love how real and candid you are about your design process. I find it fascinating to read how you and the other brilliant designers come up with ideas then process through it to a finished piece. Thank you for sharing your talents 💕
Looks amazing, very different. Enjoyed reading your design process!!
This is gorgeous 😍 I think i can do it 💪🏻
This is my absolute favourite design from the magazine! Thank you 😍 I’m currently teaching myself to knit just so I can make something like this!! It will be my ‘happy’ project to get me through winter 😀
I’m so glad you like it! If you need any help with your knitting feel free to drop me a message on Facebook or somewhere. :) Also, when the time comes, be sure to re-visit my blog as there is errata here for the tunic.